A few more notes on Java Server Faces (JSF)
Let's start with a simple example, where we will calculate list of prime numbers 2..N, where N will be given as the user input in the browser. The java code will return an ArrayList of prime numbers, and the webpage will render them into rows. For this end we will use JSF capability to iterate over the list.
1. Create a new Jakarta EE 9 project the same way as last time (again, we only need JSF and CDI - both specifications and implementations), delete the index.jsp and the automatically generated servlet and add JSF page index.xhtml and Java class PrimeCalculator, which will be a request-scoped CDI backing bean.
2. For generating the primes we will use Eratostenes sieve (if you are not familiar, check it out, it is a simple straight-forward beautiful idea).
3. The bean will have the private property n - that will be set from the webpage, and its associated getter and setter (notice you can generate getters and setters by right-click and selecting show context actions). The primes will be stored to a property primes of type List<Integer>. It would be possible to keep only the getter instead of including the property itself as well (the bean will work also with getter only). However, due to the way page is processed and rendered, getters are often called more than once during one request-response cycle (I recommend you to read this: Why JSF calls getters multiple times), and therefore getters should not contain any business logic. They should only return the value of the property that was calculated in some action listener, or another place. Or at least they should check if it already has been calculated, and only if it was not, it should calculate its value. We will use this approach here, but since the getter is called the first time even before the properties of the bean are set (i.e. for n==0), we should also reset the list to null when the property n is set:
    private int n;
    private int cnt = 0;
    private List<Integer> primes;

    private void calculatePrimes()
    {
        System.out.println("calculatePrimes() n=" + n + ", cnt=" + (cnt++));
        primes = new ArrayList<>();
        boolean compound[] = new boolean[n + 1];
        for (int i = 2; i <= n; i++)
            if (!compound[i])
            {
                primes.add(i);
                for (int j = 2 * i; j <= n; j += i) compound[j] = true;
            }
    }

    public List<Integer> getPrimes()
    {
        System.out.println("getPrimes() n=" + n + ", cnt=" + (cnt++) + "primes==null: " + (primes == null));
        if (primes == null) calculatePrimes();
        return primes;
    }

    public int getN() {
        return n;
    }

    public void setN(int n) {
        System.out.println("setN() n=" + n + ", cnt=" + (cnt++));
        this.n = n;
        primes = null;
    }
Note: You may be curious where will those debugging printouts be printed. In upper left corner of the screen, where you see the GlassFish - the selected run configuration, you can select Edit configurations... and then in the Logs tab, you can select a file where the console output should be printed (that text file might need to be existing already) and in that file you will find a link to a file with debugging output printed to standard output. See example of such a logfile produced: jsf-ajax-log-example.txt.
As you see, we only calculate the primes when the property is null, but when we get a new n, we reset the property to null again. A cleaner and more recommended approach would be to call the calculatePrimes() method from some method that would be called from the commandButton - instead of having "index" inside of its action (the page to load next) we could specify "#{primeCalculator.someMethod}" expression - naming some method that would return String containing "index". Such method would be called only one time and after all the setters of the properties have been called with the new values. We will demonstrate that approach in the next example below and here we will use this checking of the null value in the getter.
4. Let's take a look into the JSF xhtml file how this property of type List will be iterated and rendered. From the old times of JSP we could use the c:forEach tag that can iterate over a list (it is a part of JSTL library that is also part of JSF and typically is assigned to the c: namespace). But first we take care of the form for entering the value of n:
    <h:form>
        N = <h:inputText value="${primeCalculator.n}" />
        <h:commandButton action="index" value="calculate" />
        <br/><br/>
    </h:form>
Pressing the button will result in loading the very same page (index[.xhtml]). Now for the rendering the list, we can use the c:forEach tag:
        <c:set var="order" value="${0}" />
        <c:forEach items="${primeCalcuator.primes}" var="p">
            <c:set var="order" value="${order + 1}" />
            <h:panelGrid columns="2">
                <h:outputLabel value="${order}." />
                <h:outputLabel value="${p}" />
            </h:panelGrid>
        </c:forEach>
Notice the variable order that is set with the c:set to 0, and then incremented so that the ordinal number of the prime can be printed in the first column. As mentioned above, for some JSF rendering reasons, this will unfortunately call the primes getter for each row printed - but if the getter only returns the property, it's not an issue. The output looks as follows:
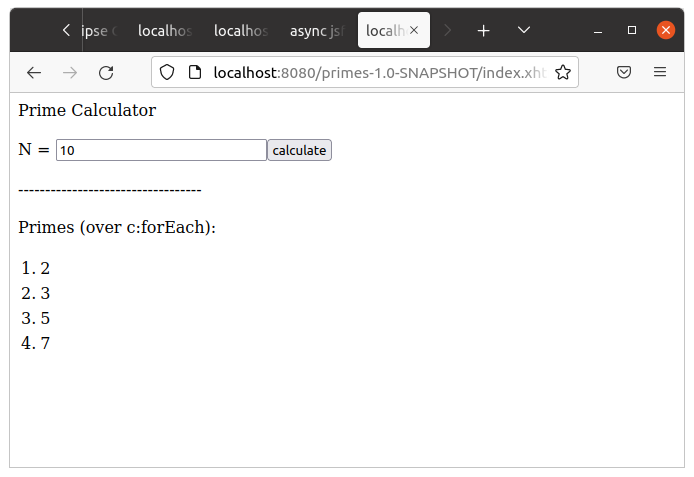
5. Now let's use another - preferred way of iterating over the list - using a "ui component". It is important to notice that these two ways cannot be combined, because they are effective in different part of the JSF cycle - the c: tags are processed first before the component tree is constructed, and then the components in the tree are processed.
Primes (over ui:repeat):


<ui:repeat value="${primeCalculator.primes}" var="p">
      #{p}

</ui:repeat>
If we like to decorate the UI repeat into a table (as was done above with the c:panelGrid), here we can use the HTML table tags, for an example, look here: JSF 2 repeat tag example.
Note: when looking for information on-line, you need to be careful about what front-end does that on-line example page use. There are many variants and flavours of front-ends similar to JSF - such as rich faces, prime faces, and others. In this part of the course, we would like to use only the standard JSF.
6. Finally, notice the annotation @PostConstruct that can decorate public void init() method, and that
should be used as been initializer instead of constructor as the application server in some situations may decide/need to call constructor for the "same" bean multiple times. In this case we have nothing to initialize, but we will use it in future.
   @PostConstruct
    public void init() {
        // In @PostConstruct (will be invoked immediately after construction and dependency/property injection).
        System.out.println("@PostConstruct init() n=" + n + ", cnt=" + (cnt++));
    }
7. The complete project can be downloaded here: jsf-primes.zip.
A second small project we would like to build today is a simple chat application that will use JSF. The application bean will contain a list of messages that were entered by all the users who ever logged in and typed something, and the webpage will show them and allow to add a new message. The application starts on a page, where the user needs to enter his or her name:
        Hello welcome to JSF Chat<br />
        <h:form>
            Enter nickname: <h:inputText value="#{chat.userName}" />
            <h:commandButton value="login" action="chat" />
        </h:form>
And the corresponding session scoped bean will only remember the name of the user. Remember the session-scoped CDI beans need to be serializable.
@Named
@SessionScoped
public class Chat implements Serializable {
    private String userName;
    public String getUserName()
    {
        return userName;
    }
    public void setUserName(String userName)
    {
        this.userName = userName;
    }
}
We will inject it to the application-scoped bean that will serve the main xhtml JSF file that will take care of the chatting. First the chat.xhtml file:
       Hello #{chat.userName}! <br /><br />

        <pre>
#{chatText.textLines}
        </pre>

        <h:form>
            say something:
            <h:inputText value="#{chatText.newLine}" />
            <h:commandButton value="say" action="chat"/>
        </h:form>
As we see here, the name of the user is taken from the session-scoped bean, while the past messages are taken from the application-scoped bean.
@Named
@ApplicationScoped
public class ChatText {
    public ChatText() {
        lines = new ArrayList<String>();
    }
    @Inject
    Chat chatC;
    List<String> lines;
    private int count = 0;
    public String getTextLines()
    {
        StringBuilder sb = new StringBuilder();
        for (String ln: lines)
        {
            sb.append(ln);
            sb.append("\n");
        }
        return sb.toString();
    }

    public void setNewLine(String line)
    {
        count++;
        lines.add(chatC.getUserName() +": "+count +": " + line);
    }

    public String getNewLine() { return ""; }
}
Note: How can a session-scoped bean be inserted to an application-scoped bean? Well, in fact in the (already deprecated) light-weight JSF beans (they used annotation @ManagedBean instead of @Named, and @ManagedProperty instead of @Inject) this was not possible, they used static dependency injection, and only longer-lifetime bean could have been injected into shorter lifetime bean. With the CDI beans that have dynamic dependency injection, both directions are possible, and the proper session bean is always available, when rendering a particular page of a particular user (and his or her session).
The resulting application is available here: jsfchat-EE9.zip.
Of course, such a chat would not be practical, because the user only sees the message from its communicating peer after he or she manually refreshes (or sends a new message). We would like to have the page immediatelly refreshed when a new message is received. There are different ways how this can be achieved, but in the following example, we are going to use a pending ajax request. Some elements in the JSF xhtml file can be decorated with f:ajax tag, which will result in background asynchronous request instead of a full request-response page reload. They can indicate which elements on the page need to be rendered when the ajax returns. Typically this would be used in a fast request-return ajax requests to obtain some data from the server in a particular situation. In our case, we will make the ajax request wait on the server for new incoming messages, but returning periodically every 30 seconds. Similarly as with the asynchronous servlet solution, we will use javascript, but this time it's role will only be to handle the incoming ajax response in a callback. The ajax request will be automatically generated by the JSF thanks to the f:ajax. However, in order to achieve that, we will use a hidden command button, which will be "clicked" by the javascript code in order to send a new pending request to the server, when the previous one will have returned. Here we go - there will only be a single JSF index.xhtml file:
<f:view>
    <h:head>
        <title>async jsf app</title>
        <h:outputScript library="js" name="resendscript.js" />
    </h:head>
    <h:body>
        async jsf app
        <h:form id="jsfappform">
            say something:
            <h:inputText id="newmsg" value="#{jsfAsync.newMessage}" />
            <h:commandButton id="sendbut" value="say" action="#{jsfAsync.say}" />
            <br /><br />
            Messages:
            <br /><br />
            <h:outputText id="msgs" value="#{jsfAsync.msgs}" escape="false">
            </h:outputText>
            <h:commandButton id="reloadbut" value="v" action="#{jsfAsync.resend}" style="visibility: hidden">
                <f:ajax execute="@this" render="msgs" onevent="handleAjax" onerror="handleError" />
            </h:commandButton>
            <h:commandButton id="clearbut" value="clear" action="#{jsfAsync.clear}" />
        </h:form>
        <h:outputScript>resendRequest()</h:outputScript>
    </h:body>
</f:view>
The style="visibility: hidden makes the button invisible. It will only be "clicked" by the resendRequest() function. The f:ajax inside of h:commandButton means that the button will only issue a background ajax request instead of full page reload. It specifies the javascript handler functions, and the id of the element that needs to be rendered when the ajax returns (with new data that required for that re-rendering).
Notice that the action of the commandButton is not the name of the page to be followed, but a name of the method that is to be called when the button is pressed - in both cases - it's the say() and resend() methods. The first is called when the user clicks the [say] button, the second for sending the background ajax request.
In the header section, the javascript file is included. It has to be located in the resources/META-INF/resources/js folder. The function resendRequest() is called from the page once, so that the first pending request is sent.
The script is very simple this time:
function handleAjax(data) {
    var status = data.status;
    switch(status) {
        case "begin": // This is invoked right before ajax request is sent.
            break;
        case "complete": // This is invoked right after ajax response is returned.
            break;
        case "success": // This is invoked right after successful processing of ajax response and update of HTML DOM.
            resendRequest();
            break;
    }
}

function resendRequest()
{
    document.getElementById("jsfappform:reloadbut").click();
}

function handleError(data)  { }
Notice the id of the button element is formed of two parts - the id of the enclosing form followed by a colon and the id of the button itself. After the request successfully returns, it is resent by clicking the button again.
Finally the application scoped CDI bean that takes care of both the asynchronous pending requests and sending a new message as well. Here we use the usual java synchronization monitors with the wait-notify mechanism so that a new message arriving from another user will interrupt all pending requests in order to deliver the message to all the communicating peers immediately.
@Named
@ApplicationScoped
public class JsfAsync
{
    private Listxi< messages;
    private Object wakeup;

    @PostConstruct
    public void init()
    {
        wakeup = new Object();
        messages = new ArrayList<String>();
    }

    public void setNewMessage(String msg)
    {
        synchronized(messages)
        {
            messages.add(msg);
        }
    }

    public void say()
    {
        synchronized(wakeup)
        {
            wakeup.notifyAll();
        }
    }

    public String resend()
    {
       try {
            synchronized(wakeup)
            {
                wakeup.wait(30000);
            }
        } catch (Exception e) { }
        return "index";
    }

    public void clear()
    {
        synchronized(messages)
        {
            messages.clear();
        }
        say();
    }

    public String getNewMessage()
    {
        return "";
    }

    public String getMsgs()
    {
        StringBuilder msgs = new StringBuilder();
        synchronized(messages)
        {
            for (String m : messages)
            {
                msgs.append(m);
                msgs.append("<br/>");
            }
            return msgs.toString();
        }
    }
}
The complete project can be downloaded here: asynchat-EE9.zip.
Now we should be ready to proceed with solving the homework published in the LIST system.